Foundation Brush or Makeup Sponge?

Which should you pick?
You’ve probably asked yourself this question several times, beautiful.
“Should I use a foundation brush or a makeup sponge?”
Everyone seems to have a different opinion on this nowadays. And even worse, what works for one person might not work for you. Just like how your skin type is unique, each tool is also unique. And spoiler alert: At the end of the day, it really comes down to your personal preference.
But it’s not that simple.
Why? Because gorgeous, there are key things you should keep in mind before making this decision. Picking the right (or wrong) tool can mean the difference between a flawless finish… Or skin breakouts. But don’t worry, we’ll share all of it with you in this blog.

In this blog, you’ll learn:
• The main difference between each tool.
• The benefits of a foundation brush.
• The benefits of a makeup sponge.
• How to clean a foundation brush.
• How to apply foundation with them.
• How to clean a makeup sponge.
• The best foundation brushes.
• The best makeup sponges.
• Extra MUA tips for you.
What’s the difference anyway?
Foundation Brush VS. Makeup Sponge.
Well, the main thing is the texture and application technique.
A foundation brush has firm bristles that let you put on makeup at a more careful pace, so you get to apply lighter makeup in a spot, while looking heavier in others (if you want). The materials can vary a lot with these, but the best foundation brushes are often made with taklon bristles.
On the other hand (figuratively & literally), you have sponges. These can also vary a lot in terms of shape and size, but cosmetic sponges are often used wet or damp to create that nice dewy finish and hydrate your look. Makeup sponges are also perfect for getting into smaller areas, like the nose or eyes.
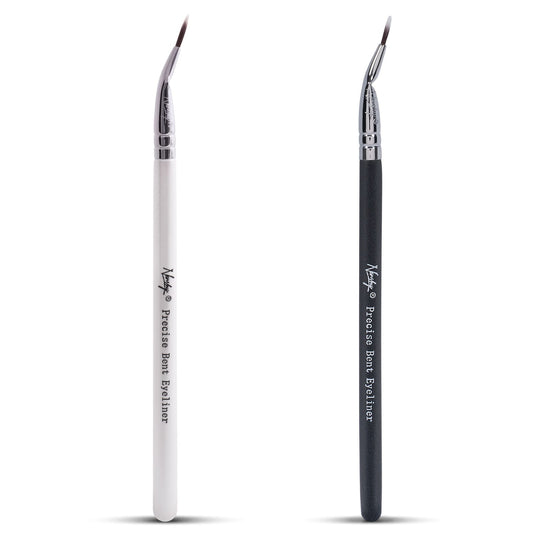
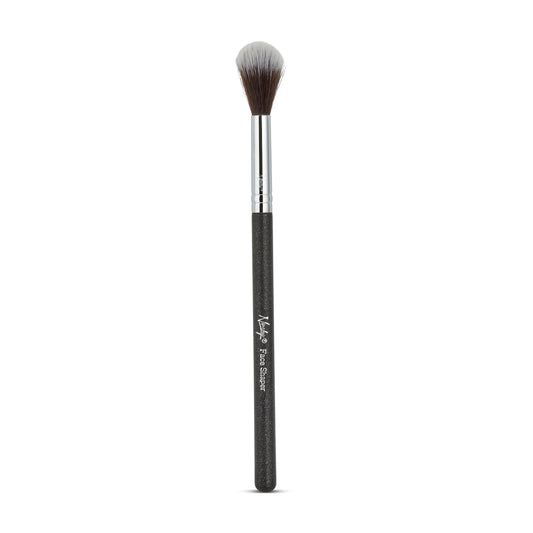
Types of Foundation Brushes.
There’s a couple different types to choose from, each of them is for a specific technique:
• Flat Top.
This brush has a flat surface that’s perfect for applying foundation evenly across your face while avoiding streaks.
Never used one before? Check out our full guide with pictures and a video tutorial to help you master the technique.
• Buffing.
You can use these in circular motions to build coverage without getting all cakey.
• Stippling.
Stippling brushes are perfect for adding a little bit of makeup at a time, so you can control how much coverage you want.
• Angled.
Angled ones have slanted bristles that make it easy to apply blush or bronzer on the apples of your cheeks.
• Kabuki.
The kabuki brush is fluffy & dense. It’s also perfect for applying setting powder for that sun-kissed look.
• Sponge.
Despite their name, these are brushes. They mix the best of both worlds and help you apply concealer under your eyes.

• Dual-ended.
This fancy-sounding one is designed to help you switch between applying and blending. This option is very versatile.
Types of Makeup Sponges.
• Flat sponge.
The flat type is great for getting into larger areas, like your cheeks and forehead. It’s for you if you want that lighter, airbrushed effect.
• Wedge.
This sponge is shaped like a triangle and looks quite exotic. It’s very good at getting into hard to reach spots like the corners of your eyes. You can use the pointed tip to apply makeup more precisely.
• Marshmallow sponge.
Beautiful, don’t try eating this one. Marshmallow sponges are soft and squishy and very handy for highlighting.
• Special type.
Nanshy has a special kind of sponge. We added one extra surface to give you even more ways to blend, contour or cover up imperfections. Take a closer look at what makes it unique.
Cruelty-Free & Traditional Materials.
You will mostly see these kinds of materials:
• Brushes.
Vegan types.
- Taklon: A cruelty-free material that’s extremely soft on the skin (it’s also what Nanshy’s brushes are made out of).
- Silicone: It’s another vegan alternative and often used for specific applications like cream or liquid foundations.
- Synthetic blends: It sounds fancy, but this is mostly just a mix of fibers made from gentle materials.
- Nylon: A durable synthetic option. It’s very popular and also used in clothing.
- Microfiber: This is a man-made material that is great at picking up makeup.
Non-vegan types.
- Camel Hair: A mix of different animal hairs (surprisingly though, it’s often not from camels).
- Sable: A natural hair material, typically sourced from animals like weasels.
- Pony Hair: Natural hair from ponies and it’s often used for blending.
- Bristle: Stiff natural hair from various animals like pigs or boars.
- Goat Hair: Soft natural hair from goats.
• Sponges.
Vegan types.
- Charcoal: These are kinda rare. They use activated charcoal thanks to its antibacterial properties.
- Silicone: This is a great option if you want a sponge that is super easy to clean.
- Microfiber: We’re sure you’ve seen this one before. Microfiber is often considered one of the best material since it easily picks up makeup.
- Hydrophilic Foam: Again, it sounds fancy, but it’s just a soft sponge that soaks up water to help you apply your foundation more smoothly.
- Natural Cellulose: This kind of sponge is made from plants. They can be a bit more expensive, but they’re good for both your skin and the environment.
Non-vegan types.
- Latex: This isn’t quite non-vegan, but some people are concerned about the environmental impact that this puts on the forests.
Reminder: You don’t have to be vegan to use vegan brushes. Many people switch to them because they’re easier to clean and tend to last longer. Learn the 6 reasons why switching to vegan beauty products is a great idea.
Benefits of a Foundation Brush.
Brushes are better than makeup sponges in a few ways:
1. They’re more precise.
Just look at their shape. A foundation brush helps you put makeup exactly where you want it. While you can also do that with sponges, brushes are thinner and help you apply makeup on specific spots.
2. They give you a more flawless finish.
Brushes are just better at blending. Since they give you more control, you get to avoid streaks and (God forbid) looking all cakey. So it helps highlight your features instead of hiding them.
3. You can use them with liquids or creams.
Another great thing about them is that they’re super versatile. A brush can really help you apply blush, highlighter or even layer your makeup. So you can rely on your brush whether you’re at home or applying a quick touch-up while you’re out with your besties.
4. They let you decide how thick (or thin) to apply.
Ever heard of the “I just woke up like this” look? You can easily get that look with a brush. Want a more glam vibe instead? Just add another layer. Brushes give you a lot more options.
By the way, if you want to learn all about this nude makeup style, then take a look at our easy tutorial on how you can get that look today.
5. They can last a reaaallly long time.
A great brush is made to last. If you clean them properly (that means every day), keep them dry and use gentle soap, then it’ll stay in perfect shape for years.
Here’s some quick tips to maintain your brush:
• The most important one: Wash them. After. Each. Use!
• Avoid using harsh soaps that can damage the bristles.
• Let it air dry upside down to keep the bristles fluffy.
• Avoid pulling on the bristles when you clean it.
• Store it upright in a holder to keep it safe.

6. They don’t absorb (as much) makeup.
They just don’t soak up as much product as sponges do. This means your makeup will last longer and you’ll save money for more brushes. But it gets better (more in the next point).
7. They’re more hygienic.
Like we just said, brushes don’t absorb as much makeup. This means there’s less chance of bacteria building up on your beauty picks.
Benefits of a Makeup Sponge.
So we just gave brushes a lot of points… But what about sponges? Well, there are some things that makes them better:
1. They give you a dewy finish.
Sponges are awesome for that natural, dewy finish. When you use them damp, they help your foundation blend right into your skin, making you look fresh and glowy without caking on the makeup.
And if you love makeup tips like that, you’ll love our newsletter.
2. They give you lots of coverage.
Need a little extra coverage? Sponges are amazing for that. And since they spread foundation so well, you can easily blend it without worrying about streaks.
3. They’re amazing for hydration.
This is for you if you have dry skin. Sponges are perfect for adding a little extra hydration to your routine. Their absorbent material helps lock in moisture, so your skin stays hydrated, and your makeup looks smooth and natural all day.
4. They’re a lot more affordable.
Sponges are often made using affordable materials and this keeps the price down. Just make sure you choose a brand that’s eco-friendly (like Nanshy wink wink).
5. They’re super light.
Some sponges are so light that you won’t even notice on your skin. This also makes them really easy to clean.
So now you know the pros & cons of each. But that’s just part of the picture. Cleaning your beauty picks is a huge part of your routine, so here’s how you can take good care of them:
How to clean a foundation brush.
Listen, we know washing your brushes can be a chore. But a clean brush is the difference between glowing skin or nasty breakouts.
The good news is that cleaning your makeup brushes doesn’t have to take 30 minutes. Here’s a video tutorial on how you can do it in just 1 minute.
Trust us beautiful, your skin will thank you.
How to clean a makeup sponge.
Cleaning your sponge can be a little bit trickier than a brush since they tend to trap more makeup. And even worse: If you don’t do it properly, you can actually damage the sponge.
But don’t worry, you’ll avoid most of those problems with these steps:
1. Rinse.
Wet your sponge with (this is super important) warm water to help get the makeup off.
2. Use gentle soap.
Squeeze a little bit of soft soap or sponge cleaner onto the sponge.
Extra tip: If you don’t have a cleaner just for sponges at home, you can use some baby shampoo instead. It’s not ideal, but it will get the job done.
3. Lather it.
Squish and rub the sponge to mix the soap, but please make sure you do it slowly. If you’re too rough, you might damage the sponge or make it tear.
4. Rinse (again).
Make sure you remove all the soapy bits, otherwise it will stay stuck in the sponge.
5. Dry it.
We recommend leaving the sponge in a ventilated area for 4 - 8 hours. The airflow helps avoid mold buildup.

How to apply foundation with a brush.
Earlier in this blog, we mentioned a few different types of foundation brushes. Each of them has a special technique, but you don’t have to be a professional MUA to know how to use them. All foundation brushes share these same steps:
• Prep your skin.
Start with a clean & moisturized face. You can also apply some primer if you need it.
• Prep the brush.
Pick a foundation that matches your skin tone and pour it into the brush. Nanshy recommends starting with just a tiny bit of makeup, that way you’ll have more control and avoid overwhelming your skin.
• Spread it across.
Follow this order:
- Forehead.
Start at the center of the forehead then move onto the temples.
- Cheeks.
Begin with both cheeks, then move onto the nose & sides.
- Lower face.
Start with the chin then gently spread it around your jawline.
Note: That’s just a general guideline MUA’s follow, you don’t have to follow it step by step.
• (Super important) Blend it well, really well.
If you don’t want to look like you’re wearing a mask or have any harsh lines, take your time to blend it properly.
As you can see, no matter what brush you pick, prepping the skin always comes first. We recommend trying out a gua sha tool or face roller before applying any sort of makeup.
How to apply foundation with a makeup sponge.

The thing about sponges is that they’re perfect for that airbrush finish. And like the foundation brushes, each type has a different application technique. But this is what you need to know:
• Dampen the sponge.
Wet your sponge and then squeeze out the excess. This prevents it from soaking up too much foundation.
• Focus on larger areas.
This is where sponges really shine. Because they have a large surface, you can cover more areas of your face.
• Use the “bouncing” technique.
Gently bounce the sponge on your skin and move your way outward. This avoids streaks and keeps your makeup looking smooth & natural.
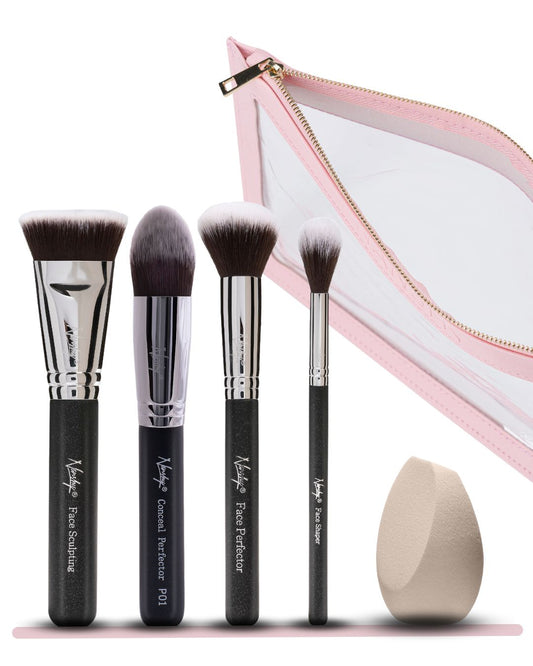
Best foundation brushes for your skin type.
Beautiful, your skin is unique. While there’s a ton of options out there, this is what we recommend:
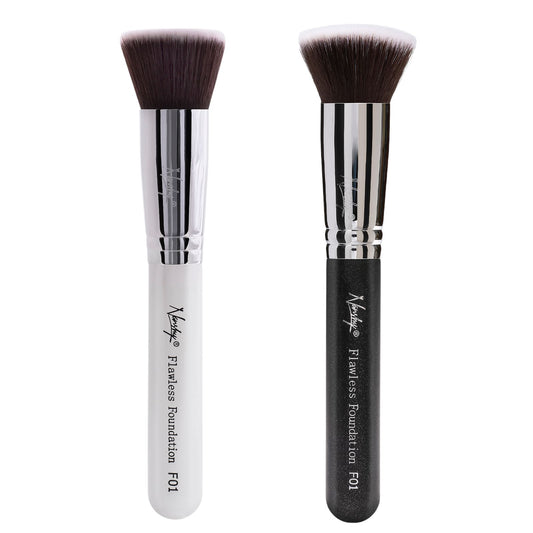
- For combination skin.

Photo by Nanshy.
A best-seller, our Flawless Foundation Brush is densely packed with taklon bristles, which makes them perfect for that natural, flawless look. This makes it ideal for those looking for a versatile brush.
- For mature skin.

Photo by Zoeva Cosmetics.
The 104 Foundation Buffer Brush by Zoeva Cosmetics is a great choice since its thick bristles make your skin look nice & even. You can also choose the color of your handle, which is always a plus.
- For oily skin.

Photo by bareMinerals.
If you have oily skin, you should try the Smoothing Face Brush by bareMinerals. It’s ideal for achieving that airbrushed finish thanks to its dual fibers.
- For dry skin.

Got dry skin? Try out the Real Flawless Foundation Brush by Laura Mercier. The domed teardrop shape helps with better control and application. It’s also very lightweight.
Best makeup sponges for your skin type.
- For normal skin.

Photo by Nanshy.
If you have normal skin, you should go for our 4-in-1 Marvel Makeup Sponge by Nanshy (wink wink). It has an extra surface that gives you a wider range of options for blending. As a plus, the micropore material helps your sponge remain damp for longer.
- For sensitive skin.

Photo by CLOMANÁ.
For those with more sensitive skin, we recommend the Mega Marshmallow Sponge by CLOMANÁ. It’s super soft and the shape helps you avoid streaks.
- For textured skin.

Photo by JUNOCO.
The Microfiber Velvet Sponge by JUNOCO works really well with textured skin. This is thanks to the dual layer antimicrobial technology, which makes it gentle on the skin.
- For acne.

Photo by Lefties.
This pack of makeup sponges by Lefties is ideal for those with acne-prone skin since it’s made with a soft, non irritating material called “polyurethane.” As a bonus, it also looks super cute.
So… Brush or Sponge?
And the winner is…
Neither!
Beautiful, if you want that flawless look that turns heads, then we recommend using both.
Pick the brush if:
If you like having control over how much makeup goes on and prefer a polished, even look that highlights your best features.
Pick the sponge if:
If you want a super soft look that feels light & fresh and gives you that natural dewy glow.